
In order to use a time clock with ProPunch, the clock must first be connected to your company network using an Ethernet cable. The steps below can then be completed.
Step 1: Configure Time Clock Settings
The IPv4 Address of the ProPunch server must be set on the time clock in order for the clock to communicate with the ProPunch Server.
- Connect the time clock to your company network using an Ethernet cable.
- Press MENU.
- Select Set COMand press OK.
- Select Ethernetand press OK. If DHCP = Yes, then verify Port No = 5005 and press ESC to return to the Set COM If DHCP = No, press OK, select Yes, and then press OK. Ensure Port No = 5005. Press ESC and then press OK to save the Ethernet setting.
- Select Server Settingand press OK.
- If Server Setting= No, press OK, select Yes, and then press OK.
- Select Server IPand press OK.
- Enter the IPv4 Address of the ProPunch server. To navigate from one number group to the next, press OK. When done, press ESC.
- Ensure SerPortNois set to 7788.
- Press ESCand press OK to save settings.
- Press ESCuntil Welcome screen appears.
Step 2: Add the time clock in ProPunch
- Log into ProPunch as an administrator.
- Go to Company Setup > Time Clocks.
- Click the Add Time Clock green plus sign icon at the top left. The New Time Clock window will appear.
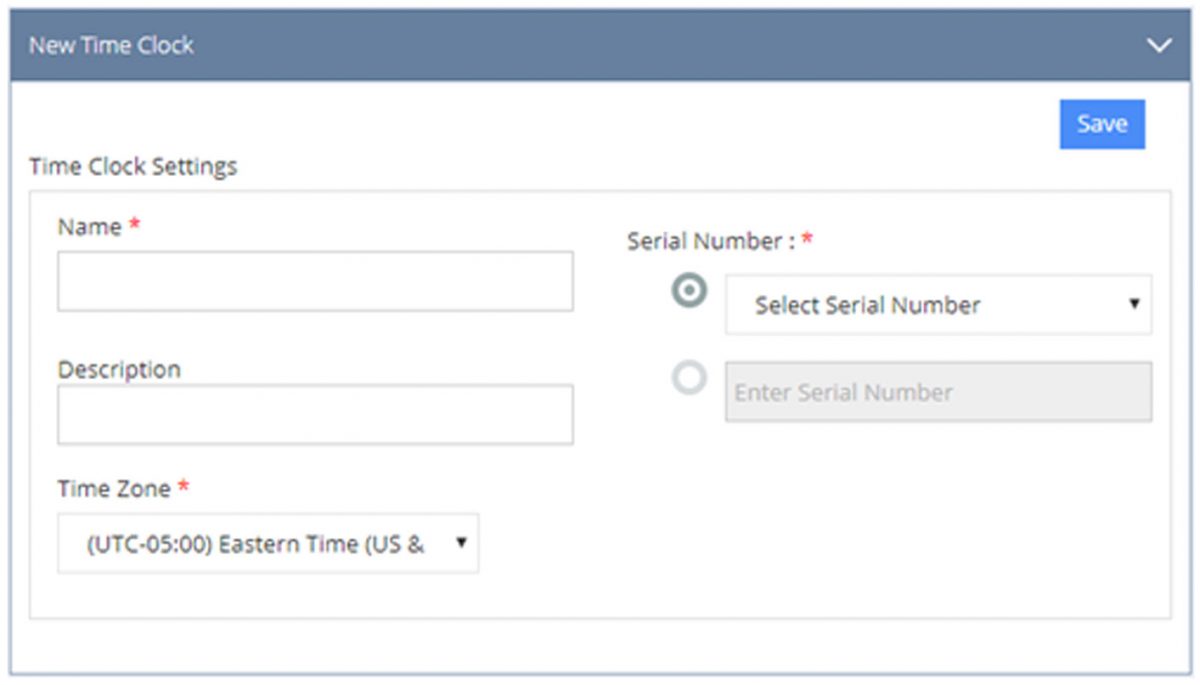
- Enter a Name for the time clock, which can be up to 50 characters.
- If Step 1 of this topic has been completed, the serial number will auto-populate in the Select Serial Number drop down list. Select the time clock’s serial number from the drop down list or select Enter Serial Number and then enter the time clock’s serial number.
- Enter a Description if desired (optional).
- Select the Time Zone. Time Zone will default to the time zone defined within Company Setup > General Settings.
- Click Save when done.
After saving, additional filter options will appear in the Assigned Employees section. By default, all employees are assigned to the time clock; however, there are other filter options that will allow individual employees or groups of employees to be assigned to the time clock.
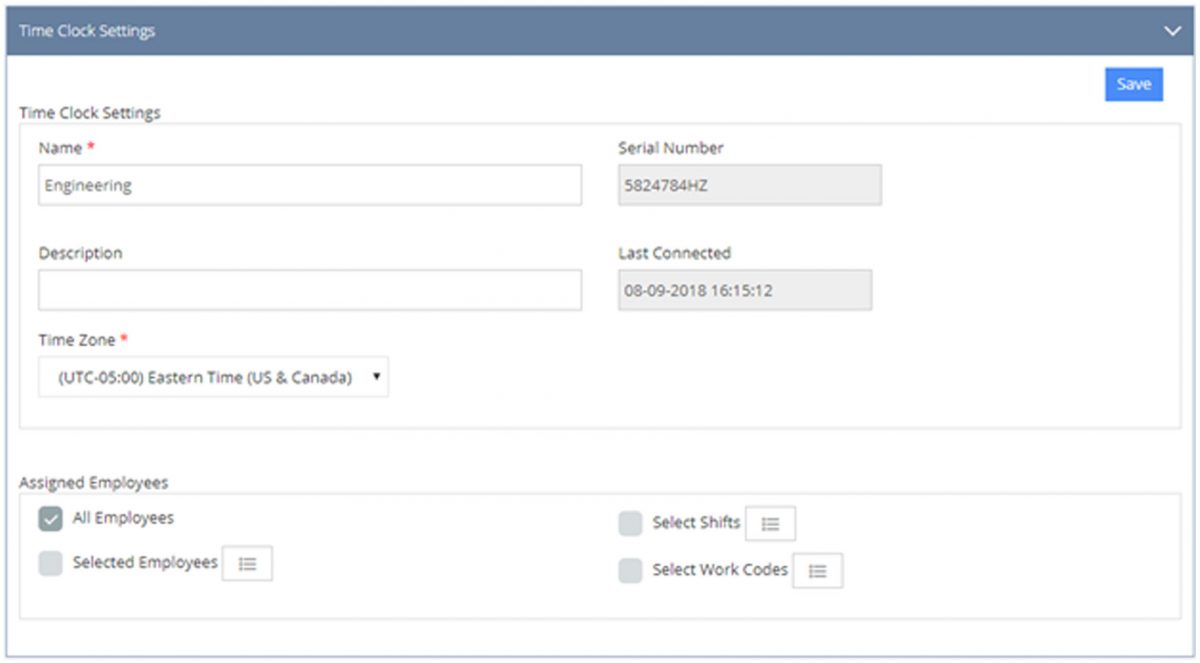
- Assigned Employees Filter Options
- All Employees – default; all active employees are assigned to the time clock.
- Select Employees – select this option to assign individual employees to the time clock. All active employees will be listed.
To select one or more employees, click the List  icon and check the box next to the applicable employees. Click DONE when finished.
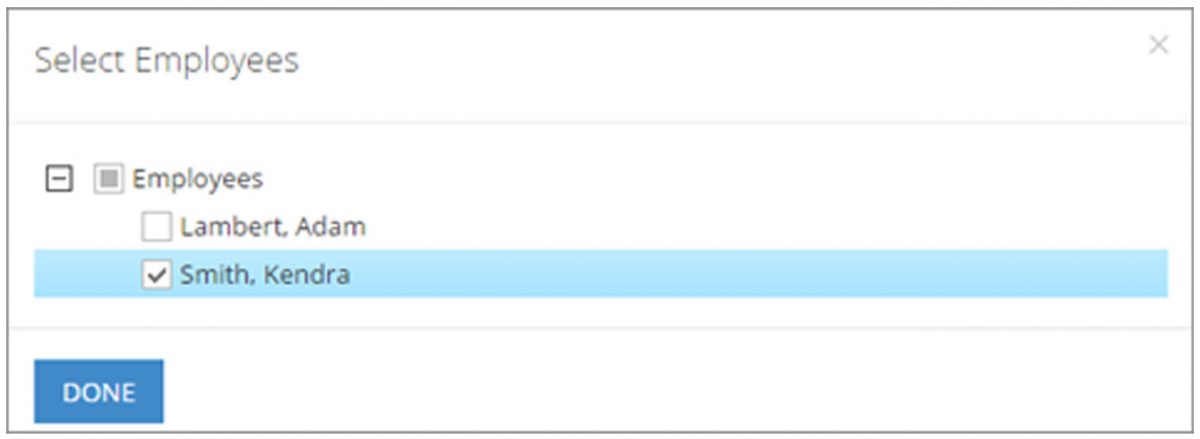
Note: The Select Employees filter can also be accessed from Company Settings > Time Clocks by clicking
the Assigned Employees  icon.
icon.
- Select Shifts – select this option to assign to the time clock employees whose default shift (assigned on employee profile) is specified in the list.
To select one or more shifts, click the List icon and check the box next to the desired shift(s). Click DONE when finished.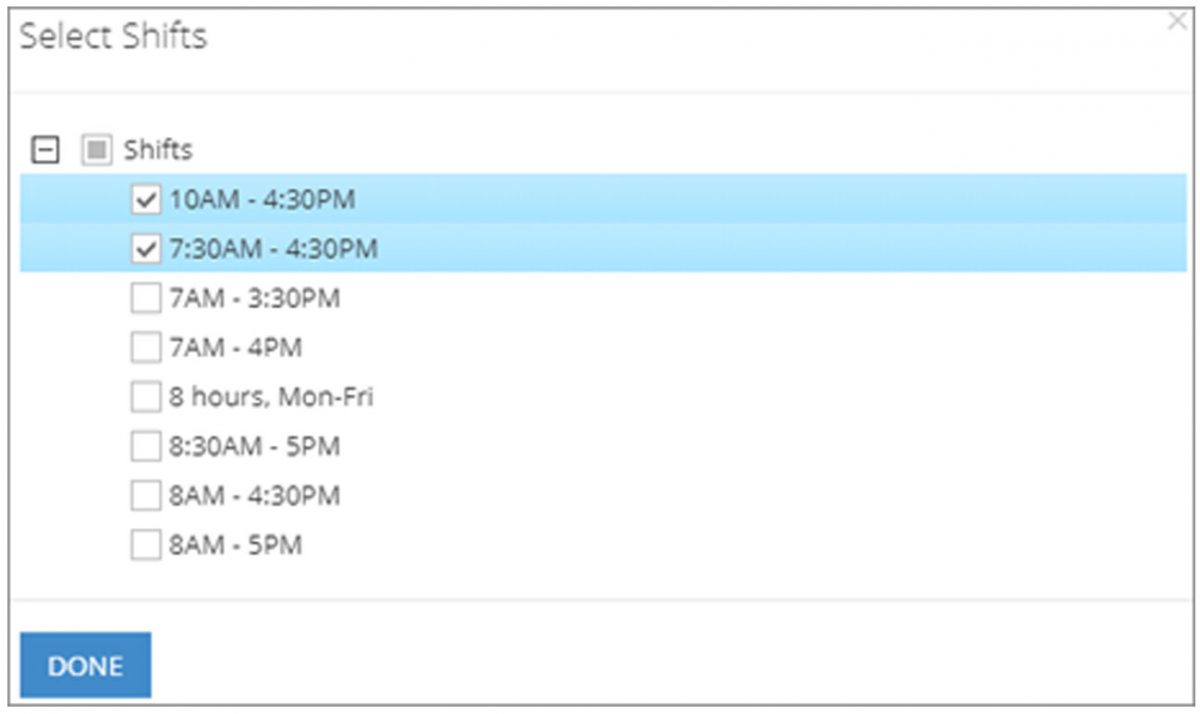
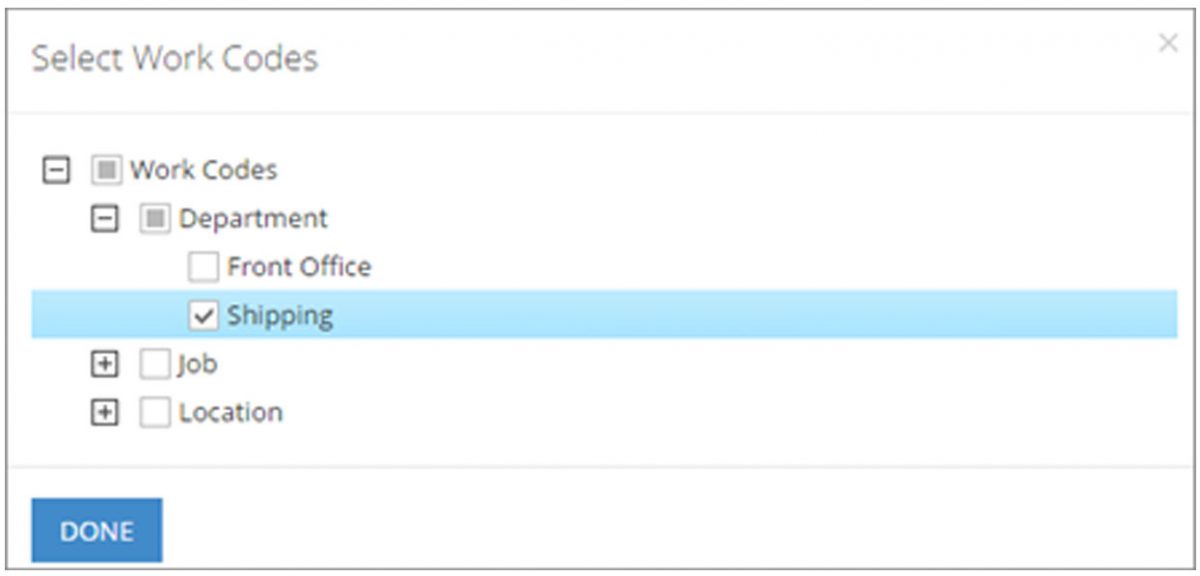
- Select Work Codes – select this option to assign to the time clock employees whose default work codes (assigned on employee profile) match those specified in the list.
To select one or more work codes, click the List icon and check the box next to the desired work code(s). Click DONE when finished.
- Click Save when done.